I recently bought a Chromecast device, and I use VLC in my Linux computer to stream videos to our TV. Though not always, sometimes these videos come from YouTube, and I would like to be able to see the video subtitles in the TV, but as the time of writing this, VLC+Chromecast and subtitles don't seem to play along nicely (see https://code.videolan.org/videolan/vlc-android/issues/502).
While a future version of VLC is likely to include this feature, in the meantime I figured out the way to hardcode the subtitles. It is very easy, but time consuming, since we have to encode the video again. The following commands are an example of what needs to be done:
(useful to see the different available formats, and get the one that corresponds to 1280x720)
youtube-dl --list-formats https://www.youtube.com/watch?v=AW138ZTKioM
(and the available subtitles)
youtube-dl --list-subs https://www.youtube.com/watch?v=AW138ZTKioM
(download the video in the required format, -f, and convert the subtitles to the .srt format)
youtube-dl -f 22 --convert-subs srt --write-sub --sub-lang en https://www.youtube.com/watch?v=AW138ZTKioM
(use ffmpeg to reencode with the downloaded subtitles hardcoded)
ffmpeg -i The\ Anthropocene\ -\ The\ age\ of\ mankind\ -\ Docu\ -\ 2017-AW138ZTKioM.mp4 -vf "subtitles='The Anthropocene - The age of mankind - Docu - 2017-AW138ZTKioM.en.srt'" The_age_of_mankind.mp4
Done!
[update: 8/1/2019. Hardcoding the subtitles might be handy in several situations, but for watching YouTube videos via Chromecast, it is actually much easier to use Chromium (I'm using ArchLinux where Chrome is not in the official repositories), which comes with the option of casting YouTube, a given tab, or even the whole desktop).
Sunday 6 January 2019
Saturday 9 December 2017
Speeding up / down audio files
My children want to have some of the songs they listen on the radio in their MP3s.
This is a no-brainer. After they find the videos they want in YouTube, I put all the URLs in a file ('bajar.txt') and can get all the MP3 files with the following command.
youtube-dl -a bajar.txt -x --audio-format mp3 -o '%(title)s.%(ext)s'
But the second step is a bit more fun. One of the MP3s is wrong and it plays the songs a bit slower than it should. Instead of buying a new one, I just speed up the MP3 files in the computer before uploading them to the player. This script will just get all the *mp3 files in a directory, speed them up according to the SP factor, and copy them to the directory 'emma_mp3s', ready to upload to my daughter's player (modifying the IFS variable allows having white spaces in the file names)
#!/bin/bash
# mp3speed.sh # Adapted from https://ubuntuforums.org/showthread.php?t=1259851
SAVEIFS=$IFS
IFS=$(echo -en "\n\b")
FILES="*.mp3"
mkdir -p emma_mp3s
for f in $FILES
do
AR=96k
SP=1.08897 # Speed up: ini_length * (1/speedup) = final_length
echo Encoding $f
mplayer -af scaletempo -speed $SP $f -vc null -vo null -ao pcm:fast:waveheader:file=$f.wav
ffmpeg -i $f.wav -acodec libmp3lame -ab $AR emma_mp3s/$f
rm $f.wav
done
IFS=$SAVEIFS
Sunday 19 November 2017
Parental control in Linux
Having small children, I needed to find a way to control how much time they spent daily using the computer.
The page https://wiki.archlinux.org/index.php/Parental_Control suggests timekpr and timoutd but both seem to be obsolete, since I couldn't make them work properly.
In the end, the solution that fits me is to use both PAM and Workrave.
PAM is easy to configure and the children cannot stop it, but Workrave is not meant as a parental control software, so by default it shows a window, which the children could easily close in order to avoid the prescribed time limit. In order to fix this, I just make Workrave not to show in the Icon Tray, and just to open as a regular window, which then I hide from the taskbar with wmctrl. I create the following minimal script, which I configure to start up automatically with each session, so Workrave starts in the background, and the children cannot easily close it (when they learn a bit more about Linux they will easily figure out how to stop it, but I still have a few years until that happens!).
#!/bin/bash
/usr/sbin/workrave --sm-client-disable &
sleep 1
wmctrl -r "Workrave" -b add,skip_taskbar
When they reach the daily limit, Workrave will show them a warning and give them 30 seconds before the session is blocked (I would like to give them perhaps 5 minutes before the session is blocked, but for the moment I didn't figure out how to change this).
The Workrave configuration I used can be seen in the following images:


The page https://wiki.archlinux.org/index.php/Parental_Control suggests timekpr and timoutd but both seem to be obsolete, since I couldn't make them work properly.
In the end, the solution that fits me is to use both PAM and Workrave.
- PAM (http://www.linux-pam.org/) "is a suite of shared libraries that enable the local system administrator to choose how applications authenticate users", and there is a module called pam_time that "restricts access to a system and or specific applications at various times of the day and on specific days". So, with this I can limit access to the computer to only, for example, the weekends.
- Workrave (http://www.workrave.org/). Workrave is originally designed to assist "in the recovery and prevention of Repetitive Strain Injury (RSI). The program frequently alerts you to take micro-pauses, rest breaks and restricts you to your daily limit."
PAM is easy to configure and the children cannot stop it, but Workrave is not meant as a parental control software, so by default it shows a window, which the children could easily close in order to avoid the prescribed time limit. In order to fix this, I just make Workrave not to show in the Icon Tray, and just to open as a regular window, which then I hide from the taskbar with wmctrl. I create the following minimal script, which I configure to start up automatically with each session, so Workrave starts in the background, and the children cannot easily close it (when they learn a bit more about Linux they will easily figure out how to stop it, but I still have a few years until that happens!).
#!/bin/bash
/usr/sbin/workrave --sm-client-disable &
sleep 1
wmctrl -r "Workrave" -b add,skip_taskbar
When they reach the daily limit, Workrave will show them a warning and give them 30 seconds before the session is blocked (I would like to give them perhaps 5 minutes before the session is blocked, but for the moment I didn't figure out how to change this).
The Workrave configuration I used can be seen in the following images:


Friday 17 November 2017
Emacs interface to Recoll
Lately I'm using Recoll (a desktop full-text search tool), https://www.lesbonscomptes.com/recoll/, which comes with a GUI, but it also can be used from a terminal. I wanted to be able to use it from within Emacs and I found two existing ways:
(defun ag-recoll (string directory)
"Search using ag based on the findings of recoll. Search will be done in a given DIRECTORY, and the STRING will be interpreted as concatenated by ANDs for recoll and with ORs for ag.
The idea is that when I search, for example, for 'openacc mpi', recoll will give me all the files that have those two words somewhere in the file, and ag will find lines that match any of the terms.
For the moment this is very crude, and most options to recoll and ag are hard-coded in the ag-recoll.sh script, most notably that ag will look for a maximum of 10 matches in each file to avoid huge lists with common searches."
(interactive (list (ag/read-from-minibuffer "Search string")
(read-directory-name "Directory: ")))
(setq command-string (format "%s %s %s" "/home/angelv/localhacks/ag-recoll.sh" directory string))
(setq regexp nil)
(compilation-start
command-string
#'ag-mode
`(lambda (mode-name) ,(ag/buffer-name string directory regexp))))
which uses the ag-recoll.sh script:
- helm-recoll https://github.com/emacs-helm/helm-recoll
- counsel-recoll, bundled with swiper https://github.com/abo-abo/swiper
I already use Ivy/Swiper/Counsel, which is very nice, so route 1) didn't appeal much to me: I would have to install Helm just to get Emacs-Recoll interaction and perhaps suffer some problems by having Helm and Ivy together.
Route 2) was not very nice either because counsel-recoll will interactively search the database for matches and it will show in the mini-buffer the names of the files whose contents match the given search so you can quickly open them, but you can not see any context in the files around the search you are trying to do.
So I ended up writing a small functon (ag-recoll), that suits me better. I can give a number of words, which recoll will use to do a search, and then only on those files matching, I will call ag, which will create a buffer with all the places in the files where the given words match. The given buffer is a "compilation" buffer, so the lines are hyperlinks, which can be easily followed to open the file at the place of interest.
The function is as simple as:
(defun ag-recoll (string directory)
"Search using ag based on the findings of recoll. Search will be done in a given DIRECTORY, and the STRING will be interpreted as concatenated by ANDs for recoll and with ORs for ag.
The idea is that when I search, for example, for 'openacc mpi', recoll will give me all the files that have those two words somewhere in the file, and ag will find lines that match any of the terms.
For the moment this is very crude, and most options to recoll and ag are hard-coded in the ag-recoll.sh script, most notably that ag will look for a maximum of 10 matches in each file to avoid huge lists with common searches."
(interactive (list (ag/read-from-minibuffer "Search string")
(read-directory-name "Directory: ")))
(setq command-string (format "%s %s %s" "/home/angelv/localhacks/ag-recoll.sh" directory string))
(setq regexp nil)
(compilation-start
command-string
#'ag-mode
`(lambda (mode-name) ,(ag/buffer-name string directory regexp))))
which uses the ag-recoll.sh script:
#!/bin/bash
dir=$1; shift
ors=$(printf '%s|' address@hidden)
recoll -t -b $@ dir:$dir | sed -e "s/file:\/\///" | xargs -d '\n' ag --max-count 10 --group --line-number column --color --color-match 30\;43 --color-path 1\;32 --smart-case ${ors%|}
So, as an example, when I call ag-recoll with STRING 'openacc pgi' and DIRECTORY /home/angelv/Learning in my workstation, the result is like this:


where each line is a hyperlink to the corresponding match in the file and you can use the common grep-mode commands to open a file, go to the next match C-x `, etc.
This is useful already as it is, but I will try to make it more flexible (being able to pass arguments to recoll and ag, etc. [I'm a total noob with Emacs Lisp, so any suggestions on how to improve the code are very welcome].
Friday 9 June 2017
Oxfam Trailwalker Madrid 2017
I have been a member of Oxfam for several years now, but only last summer I learnt about the Trailwalker. As you can read in their webpage:
100km in less than 32 hours and obtaining at least 1500€ in donations requires some work, so after talking with my family and convincing a group of colleagues at work and friends, we managed to set up a team around November 2016 for the Trailwalker Madrid 2017. Below is the team webpage (as per June 2017, after having finished the race and having obtained 1830€ in donations).

The Trailwalker Madrid 2017 webpage is very well organized, with loads of tips on training and fund raising. We tried to read all of it and get organized as soon as possible.
For fund raising we didn't organize any events, and mainly we just created a poster to put up at work and to distribute it via:

We also created a Facebook page (https://www.facebook.com/astrowalkers/), so that people could follow our training and fund raising progress.
I have to say that fund raising was more difficult than we had anticipated and full of surprises (in some cases total strangers donating large sums of money, while no money coming from people we were 'sure' would help us). In any case, at the end we managed to go well past the minimum required of 1500€ and collected for Oxfam a total of 1830€.
All the members being quite busy at work, we decided that we would train individually most of the time, but try to meet once per month to do a team session together. That would mean six training sessions together (December - May). Simone had some trips and could not join all the sessions, but he is the fittest of the group, so he was going to cope well anyway. The six training sessions were:
After all these preparations, we were quite ready for the Trailwalker, but we were always assuming that the weather was going to be hot and dry (which suits us nice, living in Tenerife). But as the race day got closer, the forecast was of rain (a lot of rain and storms), which made me quite anxious and concerned about blisters, my main issue in all the previous training days.
As it turned out, the weather was quite good throughout the race, except for some rain and hail in the first hours (there was also quite a heavy storm the following day, more or less about 30 hours after the starting time, but we managed to avoid this one completely, having finished in about 27.5 hours).
The race started on June 3rd, at 09:00. Not being a competitive race, the atmosphere was really friendly and supportive of each other. In total there were six intermediate stops, where everything was very well organized and Oxfam provided water, fruits, coffee, etc. plus physiotherapy and feet care services, and our support team was always ready to prepare us some meal or get us anything that we might need.
In total it took us some 27.5 hours to complete the 100km. Our original plan was to try and do it in 24 hours, but in the end our stops were a bit longer than planned, and towards the end we started having some serious blister issues, which forced us to go much slower. Here it is the final route (more detailed stats can be seen at: https://www.endomondo.com/users/10020566/workouts/939149852)
Some memories from the day:


Overall, this was a fantastic experience, even more when we know that all the effort we made was for a good cause. For the Trailwalker'17 edition (consisting of three races: Girona, Euskadi and Madrid), all together we were able to raise for Oxfam Intermón a total of 1059384.53€, which will be used to help improve the quality of life of many people around the world (http://trailwalker.oxfamintermon.org/en/about-trailwalker).
Well done everyone involved and many thanks to all our supporters!!
Trailwalker is the greatest team challenge of the world fight against
poverty. The challenge consists of four member teams walking 100km in
less than 32 hours. The members of the team must start together, stay
together and finish together.
The aim? To fight poverty and injustice around the world. That is why the teams commit themselves to obtain donations for Oxfam Intermón. Each contribution improves many lives, so encourage your family and friends to help.
The aim? To fight poverty and injustice around the world. That is why the teams commit themselves to obtain donations for Oxfam Intermón. Each contribution improves many lives, so encourage your family and friends to help.
[...]
Trailwalker was originally a military training exercise for the
Gurkha Regiment in Hong Kong. In 1986, it became an Oxfam event for
fundraising and since then it has grown to become one of the most
important sport challenges, held annually in different countries around
the world.

The Trailwalker Madrid 2017 webpage is very well organized, with loads of tips on training and fund raising. We tried to read all of it and get organized as soon as possible.
Fund raising
For fund raising we didn't organize any events, and mainly we just created a poster to put up at work and to distribute it via:
- e-mails to work colleagues and friends
- WhatsApp messages
- word of mouth

We also created a Facebook page (https://www.facebook.com/astrowalkers/), so that people could follow our training and fund raising progress.
I have to say that fund raising was more difficult than we had anticipated and full of surprises (in some cases total strangers donating large sums of money, while no money coming from people we were 'sure' would help us). In any case, at the end we managed to go well past the minimum required of 1500€ and collected for Oxfam a total of 1830€.
Training
All the members being quite busy at work, we decided that we would train individually most of the time, but try to meet once per month to do a team session together. That would mean six training sessions together (December - May). Simone had some trips and could not join all the sessions, but he is the fittest of the group, so he was going to cope well anyway. The six training sessions were:
Training 1:
Powered by Wikiloc
Training 2:
Powered by Wikiloc
Training 3:
Powered by Wikiloc
Training 4:
Powered by Wikiloc
Training 5:
Powered by Wikiloc
Training 6:
Powered by Wikiloc
Race day
After all these preparations, we were quite ready for the Trailwalker, but we were always assuming that the weather was going to be hot and dry (which suits us nice, living in Tenerife). But as the race day got closer, the forecast was of rain (a lot of rain and storms), which made me quite anxious and concerned about blisters, my main issue in all the previous training days.
As it turned out, the weather was quite good throughout the race, except for some rain and hail in the first hours (there was also quite a heavy storm the following day, more or less about 30 hours after the starting time, but we managed to avoid this one completely, having finished in about 27.5 hours).
The race started on June 3rd, at 09:00. Not being a competitive race, the atmosphere was really friendly and supportive of each other. In total there were six intermediate stops, where everything was very well organized and Oxfam provided water, fruits, coffee, etc. plus physiotherapy and feet care services, and our support team was always ready to prepare us some meal or get us anything that we might need.
In total it took us some 27.5 hours to complete the 100km. Our original plan was to try and do it in 24 hours, but in the end our stops were a bit longer than planned, and towards the end we started having some serious blister issues, which forced us to go much slower. Here it is the final route (more detailed stats can be seen at: https://www.endomondo.com/users/10020566/workouts/939149852)
Powered by Wikiloc
Some memories from the day:


Overall, this was a fantastic experience, even more when we know that all the effort we made was for a good cause. For the Trailwalker'17 edition (consisting of three races: Girona, Euskadi and Madrid), all together we were able to raise for Oxfam Intermón a total of 1059384.53€, which will be used to help improve the quality of life of many people around the world (http://trailwalker.oxfamintermon.org/en/about-trailwalker).
Well done everyone involved and many thanks to all our supporters!!
Tuesday 31 May 2016
Open source Fortran parallel debugging
If you develop parallel code in Fortran, your options for parallel debuggers are not that many. There are a some very good commercial parallel debuggers (mainly TotalView and DDT), and if you are using any decent-size supercomputer to run your code, chances are that these are already installed in the machine.
But from time to time I need to be able to debug code on my Linux workstation while developing new Fortran code. We do have a license for the Intel Fortran Compiler, and in previous versions this shipped with a graphical debugger (IDB) which was very nice for serial applications, but they stopped shipping it around 2013, so I decided to look for an alternative, with GDB.
Before we go for parallel debugging, let's go first for serial code debugging.
The issue with GDB is that it doesn't play nicely with Fortran. Let's see an example with the following code:
My current setting is:
* Distribution: Linux 4.2.3-200.fc22.x86_64
* gfortran: GNU Fortran (GCC) 5.1.1 20150618 (Red Hat 5.1.1-4)
* gdb: GNU gdb (GDB) Fedora 7.9.1-20.fc22
I'm able to look at the array datos, put I cannot look for subarrays, like datos(1,:,:), the pointer pdatos is OK if viewed in full, but I can't again look for subarrays of it, like pdatos(1,:)
So we will need some modified version of gdb that plays nicely with Fortran. One possible solution is to use a gdb obtained from Archer (git) http://sourceware.org/gdb/wiki/ArcherBranchManagement, branch archer-jankratochvil-vla, though I haven't used that one and I don't know how it plays along with Fortran.
Another solution is to use the modified version of gdb that comes with the Intel compiler: gdb-ia (I'm not sure if one can get gdb-ia as a standalone download, without the need to get an Intel compiler license).
With our current Intel Compiler version (2016.1.150), the versions of ifort and gdb-ia are:
* ifort: ifort (IFORT) 16.0.1 20151021
* gdb-ia: GNU gdb (GDB) 7.8-16.0.558
With these settings, if we try to use the Intel compiler provided and then debug with gdb-ia, things don't work poperly. Access to the array "datos" seems OK, but if we try to access it via the pointer "pdatos" we don't get it to work:
In principle you can access to any data if you know your way around pointers and you could use syntax like
(see http://numericalnoob.blogspot.com.es/2012/08/fortran-allocatable-arrays-and-pointers.html for examples and explanations), but this quickly becomes very cumbersome.
But if we compile with gfortran and then use gdb-ia to debug the code, then allocatable arrays, pointer to them, and subarrays of them seem to work no problem:
So now that we have a working environment for serial code, we need the jump to be able to debug parallel code. GDB is not designed to work in parallel, so we need some workaround to make it a viable platform to debug in parallel.
The usual advice is to run a variant of the following:
mpirun -np xterm -e gdb ./program
so, for example, if we are running our program with 4 processors, then 4 xterms will open, and in each of them we will have a gdb session debugging one of the MPI rank processes. The problem with this is, obviously, that we will have to go through each xterm to advance through the code, and soon this will become very cumbersome, due to having to change from window to window all the time and also because all the xterms will take up too much screen space.
So I wanted to find a solution that is more convenient (in terms of not having to replicate all the gdb commands in all windows) and also that can make better use of the available screen space.
My first attempt involved the many xterms method above, but then with two improvements:
This was more ore less OK as I was testing this on a PC with Ubuntu on it, but for other distributions keyboardcast seems to have a lot of dependencies (the source code can be downloaded from archive.ubuntu.com/ubuntu/pool/universe/k/keyboardcast/keyboardcast_0.1.1.orig.tar.gz), and also I could not use it for remote machines, since keyboardcast only knows about X applications running locally (or at least I couldn't find a way to control terminals launched in a remote server to which I had connected with ssh -X)
So I looked for another solution, one which I could use remotely and which didn't depend on installing packages with many external dependencies. A semi-decent solution that I found was to submit the mpirun job in a remote server where every process is sent to its own screen running gdb-ia (screen as in http://linux.die.net/man/1/screen) and then remotely use terminator (https://launchpad.net/terminator/, http://gnometerminator.blogspot.com.es/p/introduction.html) to connect to those running screens, with the added benefit that I can control all the gdb sessions simultaneously and, thanks to screen, I can even stop debugging in one machine, go to another one and continue debugging in the place where I left it off.
So, let's see the details. Let's assume the following simple Fortran+MPI code, a variation on the serial code above:
Which I compile with gfortran_5.1.1 and its derived mpif90 (with library version OpenMPI openmpi-1.10.2 in this case, though that version of MPI should not matter in principle) in remote server "duna", which is the same FC22 machine where I was doing the serial tests above.
mpif90 -g -o test_mpi_gfortran test_mpi.F90
And (as suggested in https://bfroehle.com/2011/09/14/debugging-mpi-python/), I launch it as:
mpirun -np 4 screen -L -m -D -S mpi env LD_LIBRARY_PATH=$LD_LIBRARY_PATH gdb-ia -tui ./test_mpi_gfortran
(you can include the & in the end if you want to get back the terminal at the remote server, but I prefer it like this, so when I finish the debugging session I can just Ctrl-C this terminal and I will not leave any leftover processes hanging around).
That line has created 4 screens sessions, and in each one a gdb-ia process will be running. So now it is time to connect to them, and I can easily do it from my client workstation (in this particular case running Ubuntu 14.04).
This is obviously not very robust, so I should look for a better way, but for the moment it will make sure that each of the terminal tabs will connect to the screen session with some interval of time between them, which works most of the time (if when you start typing anything you see that a keystroke shows more than once, then it means that some terminals tried to connect simultaneously to the same screen session giving trouble, so you should redo, perhaps with a longer sleep time.
Now, terminator is very powerful, and if you prefer to have dettached tabs to see simultaneously what is going on in each processor, you can definitely do it. For example see http://unix.stackexchange.com/questions/89339/how-do-i-run-the-same-linux-command-in-more-than-one-tab-shell-simultaneously for an example of running a grid of 8x4 terminals using terminator.
So now, if you know your way around the TUI interface, you can just control all the processors at once, or just one by one (by selecting "Broadcast none"), and you will be able to inspect properly allocatable arrays, pointers, etc.
I don't like the TUI interface that much, and I would like to use Emacs GDB mode instead, but this version of gdb-ia doesn't play very nicely with Emacs, and on calling gdb from within Emacs, I get the following error:
~$ Error: you did not specify -i=mi on GDB's command line!
To solve the issue (I've been told that this won't be necessary in future releases of gdb-ia) we need to create a wrapper script (let's call it gdb_wrap.sh):
And now, for the final touch, in the remote server we just define another script (let's call it edbg):
So now in the remote server we can do:
mpirun -np 4 screen -L -m -D -S mpi env LD_LIBRARY_PATH=$LD_LIBRARY_PATH edbg ./test_mpi_gfortran
This will do the same as before, but instead of launching 4 gdb's in the remote server with the TUI interface, we will have four Emacs (one for each MPI process) and each one with its GDB interface (which is quite a usable interface if we run gdb-many-windows).
As an example, you can see a very simple debugging session in the following video, where I start a 4-processor job with mpirun in the remote server "duna", and then at my "carro" workstation I launch terminator with 4 terminals, which I control all at the same time thanks to "Broadcast all" option, and as we can see towards the end, each terminal is running a different process, and you can see that when I print "my_id" or the contents of the "pdatos(1,:)" pointer array each process shows its own contents.
Any comments/suggestions to make the debugging session more comfortable/useful are very welcome.
But from time to time I need to be able to debug code on my Linux workstation while developing new Fortran code. We do have a license for the Intel Fortran Compiler, and in previous versions this shipped with a graphical debugger (IDB) which was very nice for serial applications, but they stopped shipping it around 2013, so I decided to look for an alternative, with GDB.
Before we go for parallel debugging, let's go first for serial code debugging.
Fortran + GDB (serial code)
The issue with GDB is that it doesn't play nicely with Fortran. Let's see an example with the following code:
My current setting is:
* Distribution: Linux 4.2.3-200.fc22.x86_64
* gfortran: GNU Fortran (GCC) 5.1.1 20150618 (Red Hat 5.1.1-4)
* gdb: GNU gdb (GDB) Fedora 7.9.1-20.fc22
I'm able to look at the array datos, put I cannot look for subarrays, like datos(1,:,:), the pointer pdatos is OK if viewed in full, but I can't again look for subarrays of it, like pdatos(1,:)
So we will need some modified version of gdb that plays nicely with Fortran. One possible solution is to use a gdb obtained from Archer (git) http://sourceware.org/gdb/wiki/ArcherBranchManagement, branch archer-jankratochvil-vla, though I haven't used that one and I don't know how it plays along with Fortran.
Another solution is to use the modified version of gdb that comes with the Intel compiler: gdb-ia (I'm not sure if one can get gdb-ia as a standalone download, without the need to get an Intel compiler license).
With our current Intel Compiler version (2016.1.150), the versions of ifort and gdb-ia are:
* ifort: ifort (IFORT) 16.0.1 20151021
* gdb-ia: GNU gdb (GDB) 7.8-16.0.558
With these settings, if we try to use the Intel compiler provided and then debug with gdb-ia, things don't work poperly. Access to the array "datos" seems OK, but if we try to access it via the pointer "pdatos" we don't get it to work:
In principle you can access to any data if you know your way around pointers and you could use syntax like
(gdb) p *((real *)my_heap + 2)
(see http://numericalnoob.blogspot.com.es/2012/08/fortran-allocatable-arrays-and-pointers.html for examples and explanations), but this quickly becomes very cumbersome.
But if we compile with gfortran and then use gdb-ia to debug the code, then allocatable arrays, pointer to them, and subarrays of them seem to work no problem:
Fortran + GDB (parallel code)
So now that we have a working environment for serial code, we need the jump to be able to debug parallel code. GDB is not designed to work in parallel, so we need some workaround to make it a viable platform to debug in parallel.
The usual advice is to run a variant of the following:
mpirun -np
so, for example, if we are running our program with 4 processors, then 4 xterms will open, and in each of them we will have a gdb session debugging one of the MPI rank processes. The problem with this is, obviously, that we will have to go through each xterm to advance through the code, and soon this will become very cumbersome, due to having to change from window to window all the time and also because all the xterms will take up too much screen space.
So I wanted to find a solution that is more convenient (in terms of not having to replicate all the gdb commands in all windows) and also that can make better use of the available screen space.
First attempt
- I would use x-tile (http://www.giuspen.com/x-tile/) to automatically tile all the xterms and maximize their use of screen space.
- I would use keyboardcast (https://launchpad.net/keyboardcast) in order to control all the xterms from one single application.
This was more ore less OK as I was testing this on a PC with Ubuntu on it, but for other distributions keyboardcast seems to have a lot of dependencies (the source code can be downloaded from archive.ubuntu.com/ubuntu/pool/universe/k/keyboardcast/keyboardcast_0.1.1.orig.tar.gz), and also I could not use it for remote machines, since keyboardcast only knows about X applications running locally (or at least I couldn't find a way to control terminals launched in a remote server to which I had connected with ssh -X)
Second attempt
So, let's see the details. Let's assume the following simple Fortran+MPI code, a variation on the serial code above:
Which I compile with gfortran_5.1.1 and its derived mpif90 (with library version OpenMPI openmpi-1.10.2 in this case, though that version of MPI should not matter in principle) in remote server "duna", which is the same FC22 machine where I was doing the serial tests above.
mpif90 -g -o test_mpi_gfortran test_mpi.F90
And (as suggested in https://bfroehle.com/2011/09/14/debugging-mpi-python/), I launch it as:
mpirun -np 4 screen -L -m -D -S mpi env LD_LIBRARY_PATH=$LD_LIBRARY_PATH gdb-ia -tui ./test_mpi_gfortran
(you can include the & in the end if you want to get back the terminal at the remote server, but I prefer it like this, so when I finish the debugging session I can just Ctrl-C this terminal and I will not leave any leftover processes hanging around).
That line has created 4 screens sessions, and in each one a gdb-ia process will be running. So now it is time to connect to them, and I can easily do it from my client workstation (in this particular case running Ubuntu 14.04).
- I start terminator, and create 4 tabs. Then, from the dropdown menu I select "Broadcast all", and then ssh to the remote server (just doing it in one of the tabs will replicate all the keystrokes to the other tabs, so the four terminals will connect to the remote server).
- Then we need to connect each of the terminals to one of the screen sessions.
- If I use (as suggested in https://bfroehle.com/2011/09/14/debugging-mpi-python/) gnome-terminal, then I have the same issue as before, that I will not be able to control all of them at the same time.
- If from terminator (while "broadcasting all" is still active) I type "screen -RR -p mpi" in one of the terminals, then it looks like all of them connect to the same screen session, which we obviously don't want.
- For the moment, an ugly hack (let me know if you have a better idea) is to make each of the terminals wait some random seconds, which we can do in bash with:
This is obviously not very robust, so I should look for a better way, but for the moment it will make sure that each of the terminal tabs will connect to the screen session with some interval of time between them, which works most of the time (if when you start typing anything you see that a keystroke shows more than once, then it means that some terminals tried to connect simultaneously to the same screen session giving trouble, so you should redo, perhaps with a longer sleep time.
Now, terminator is very powerful, and if you prefer to have dettached tabs to see simultaneously what is going on in each processor, you can definitely do it. For example see http://unix.stackexchange.com/questions/89339/how-do-i-run-the-same-linux-command-in-more-than-one-tab-shell-simultaneously for an example of running a grid of 8x4 terminals using terminator.
So now, if you know your way around the TUI interface, you can just control all the processors at once, or just one by one (by selecting "Broadcast none"), and you will be able to inspect properly allocatable arrays, pointers, etc.
With Emacs + GDB integration
~$ Error: you did not specify -i=mi on GDB's command line!
To solve the issue (I've been told that this won't be necessary in future releases of gdb-ia) we need to create a wrapper script (let's call it gdb_wrap.sh):
And now, for the final touch, in the remote server we just define another script (let's call it edbg):
So now in the remote server we can do:
mpirun -np 4 screen -L -m -D -S mpi env LD_LIBRARY_PATH=$LD_LIBRARY_PATH edbg ./test_mpi_gfortran
This will do the same as before, but instead of launching 4 gdb's in the remote server with the TUI interface, we will have four Emacs (one for each MPI process) and each one with its GDB interface (which is quite a usable interface if we run gdb-many-windows).
As an example, you can see a very simple debugging session in the following video, where I start a 4-processor job with mpirun in the remote server "duna", and then at my "carro" workstation I launch terminator with 4 terminals, which I control all at the same time thanks to "Broadcast all" option, and as we can see towards the end, each terminal is running a different process, and you can see that when I print "my_id" or the contents of the "pdatos(1,:)" pointer array each process shows its own contents.
Any comments/suggestions to make the debugging session more comfortable/useful are very welcome.
Sunday 8 May 2016
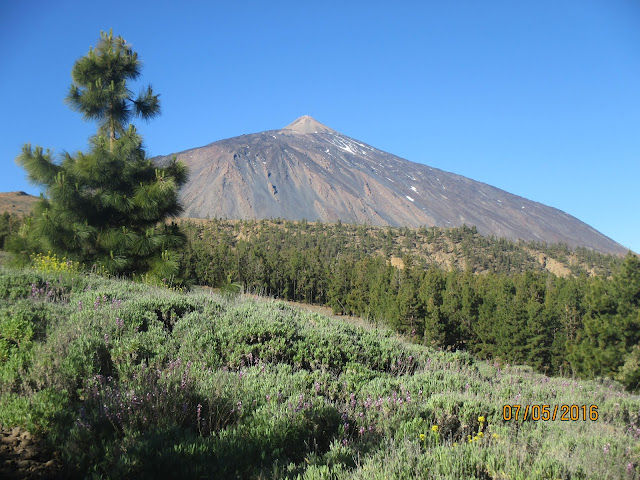
Solo Teide climb (from sea level, route 0-4)
Mount Teide is the highest point in Spain (3718m), and although I have climbed it several times, this was my first attempt from sea level.
My original plan was to do it on March 5, 2016, but just two weeks before that date it started to snow very heavily and by March 5 the roads and paths were still closed and had to postpone it, though Teide looked very beautiful covered by snow.

My second attempt was for April 9, 2016. But the paths were still closed, so I had to postpone it again.
The third attempt was for May 7, 2016. Paths were open, and everything looked fine for that date, but just the day before I read this at the Teide National Park Facebook page:
which basically means that there will be hunters in the paths that I had to use, in order to control the muflon population.

Luckily for me the hunting would be only on Friday (May 6), so I could go ahead on May 7.
Preparations
This is a long route and my plan was to do it on my own all the way to the peak, then take the cable car down to the main road where my family would pick me up to go back home. So before attempting the climb, there were some preparations to be done:
* In order to climb Mt. Teide all the way to the top, you need a permit, which you can get online at: https://www.reservasparquesnacionales.es/real/parquesnac/usu/html/detalle-actividad-oapn.aspx?ii=6ENG&cen=2&act=1
* It is obviously wise to check the weather. All was looking very good for May 7 (from http://www.meteoexploration.com/forecasts/Teide/?lang=en)

* I didn't want to go down on foot, so it is also wise to check whether the cable car is working, and I even bought a ticket online just in case. This can be done at: https://www.volcanoteide.com/en/teide_cable_car/prices_and_opening_times
* The last cable car on the way down departs the station at 16:45, so I had to make sure I would reach the station before that time. To estimate how long I would need to do the whole route I looked at Wikiloc and based my estimates on these two: http://www.wikiloc.com/wikiloc/view.do?id=5483810, http://www.wikiloc.com/wikiloc/view.do?id=3235182. Based on these routes and my statistics for previous hikes, I estimated I would need about 11 hours to do the whole climb. That meant to start walking at 05:00 to be at the peak at 16:00.
* Blisters have been a serious issue for me in previous hikes, and this was going to be a long one, so I got extra prepared and I bought: special socks (two pairs, so I could change the wet ones for dry ones en route), blister prevention cream, blister prevention tape, and band-aids. I dind't want blisters to stop me, so the plan was to stop every two-three hours and inspect the feet for possible signs of blisters and try to stop them before they could grow.
* The day before the climb I packed everything, with special attention for water (5 liters, about 50cl/hour, plus about another liter to drink just before starting).

D-Day
Kids didn't let me go to sleep until about 22:45 on Friday and, I guess due to anxiety, I was awake already by 03:00 on Saturday. My original plan was to wake up at 04:00, but it was clear I would not be able to sleep any more, so I got out of bed at 03:15. In the long run this was very lucky, because breakfast and my anti-blisters preparations took me longer than I thought. I had to force myself to have a decent breakfast at that time, then drove to Playa de El Socorro where the route starts, and I started walking at around 05:10, just a few minutes after the original plan.
The whole route took me just below 11 hours, and the Wikiloc tracking can be seen at http://es.wikiloc.com/wikiloc/view.do?id=13233788:
Some pictures taken during the climb:


 Flowering season (2)


If you like the scenery, but don't want to do the hard work, you can see the whole route in the following video (available also at: https://youtu.be/bvaJrf7CqT4), made by uploading the GPS generated track to Google Earth, as explained in a previous post (the mobile phone crashed at least three times during the climb, so the GPS data had some gaps, and this shows in the video as some jumps, sorry!). Music track: Kostbar, from the album Lux by Afenginn (https://afenginn.bandcamp.com/album/lux)
My original plan was to do it on March 5, 2016, but just two weeks before that date it started to snow very heavily and by March 5 the roads and paths were still closed and had to postpone it, though Teide looked very beautiful covered by snow.

Picture from "La Opinión de Tenerife" (http://www.laopinion.es/multimedia/fotos/sociedad/2016-02-21-41226-nieve-teide-febrero-2016.html)
My second attempt was for April 9, 2016. But the paths were still closed, so I had to postpone it again.
The third attempt was for May 7, 2016. Paths were open, and everything looked fine for that date, but just the day before I read this at the Teide National Park Facebook page:
LES RECORDAMOS QUE HOY SE REALIZARÁ LA PRIMERA (1/13) JORNADA DE CONTROL DE MUFLÓN EN EL PARQUE NACIONAL DEL TEIDE y por razones de seguridad, y mientras se desarrollan, se ha establecido la PROHIBICIÓN DE ACCESO Y PERMANENCIA EN ALGUNOS SENDEROS Y SECTORES DEL PARQUE NACIONAL.
which basically means that there will be hunters in the paths that I had to use, in order to control the muflon population.

I'm not sure what would scare me more, a hunter shooting near me or a close encounter with a muflon...
Luckily for me the hunting would be only on Friday (May 6), so I could go ahead on May 7.
Preparations
This is a long route and my plan was to do it on my own all the way to the peak, then take the cable car down to the main road where my family would pick me up to go back home. So before attempting the climb, there were some preparations to be done:
* In order to climb Mt. Teide all the way to the top, you need a permit, which you can get online at: https://www.reservasparquesnacionales.es/real/parquesnac/usu/html/detalle-actividad-oapn.aspx?ii=6ENG&cen=2&act=1
* It is obviously wise to check the weather. All was looking very good for May 7 (from http://www.meteoexploration.com/forecasts/Teide/?lang=en)

* I didn't want to go down on foot, so it is also wise to check whether the cable car is working, and I even bought a ticket online just in case. This can be done at: https://www.volcanoteide.com/en/teide_cable_car/prices_and_opening_times
* The last cable car on the way down departs the station at 16:45, so I had to make sure I would reach the station before that time. To estimate how long I would need to do the whole route I looked at Wikiloc and based my estimates on these two: http://www.wikiloc.com/wikiloc/view.do?id=5483810, http://www.wikiloc.com/wikiloc/view.do?id=3235182. Based on these routes and my statistics for previous hikes, I estimated I would need about 11 hours to do the whole climb. That meant to start walking at 05:00 to be at the peak at 16:00.
* Blisters have been a serious issue for me in previous hikes, and this was going to be a long one, so I got extra prepared and I bought: special socks (two pairs, so I could change the wet ones for dry ones en route), blister prevention cream, blister prevention tape, and band-aids. I dind't want blisters to stop me, so the plan was to stop every two-three hours and inspect the feet for possible signs of blisters and try to stop them before they could grow.
* The day before the climb I packed everything, with special attention for water (5 liters, about 50cl/hour, plus about another liter to drink just before starting).

D-Day
Kids didn't let me go to sleep until about 22:45 on Friday and, I guess due to anxiety, I was awake already by 03:00 on Saturday. My original plan was to wake up at 04:00, but it was clear I would not be able to sleep any more, so I got out of bed at 03:15. In the long run this was very lucky, because breakfast and my anti-blisters preparations took me longer than I thought. I had to force myself to have a decent breakfast at that time, then drove to Playa de El Socorro where the route starts, and I started walking at around 05:10, just a few minutes after the original plan.
The whole route took me just below 11 hours, and the Wikiloc tracking can be seen at http://es.wikiloc.com/wikiloc/view.do?id=13233788:
Powered by Wikiloc
Some pictures taken during the climb:

Time to start...

By dawn I was at the beautiful "Mirador El Asomadero"

The goal still looking pretty far!

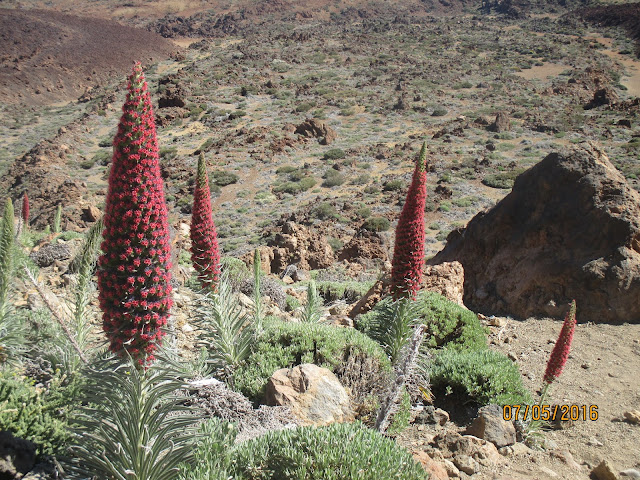
Flowering season (1)
 Flowering season (2)
La Fortaleza

The view at around lunch time

Down there it was pretty cloudy, but very sunny up here!

All lava rocks when getting closer to the peak.

And finally the summit!

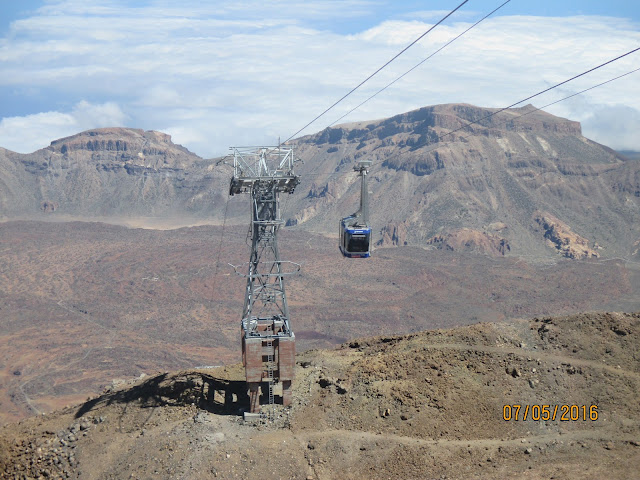
The cable car on the way down.
If you like the scenery, but don't want to do the hard work, you can see the whole route in the following video (available also at: https://youtu.be/bvaJrf7CqT4), made by uploading the GPS generated track to Google Earth, as explained in a previous post (the mobile phone crashed at least three times during the climb, so the GPS data had some gaps, and this shows in the video as some jumps, sorry!). Music track: Kostbar, from the album Lux by Afenginn (https://afenginn.bandcamp.com/album/lux)
This is obviously a hard route, and in my case I would have been happier going a bit slower, specially towards the end, when my legs were getting a bit tired, but I had to force myself to almost walk non-stop for the last few hours in order to be at the cable car station on time.
Overall it was a perfect day: the weather was very good, so I didn't need to worry about rain and it was not so cold that I had to take extra layers of clothing, just a t-shirt and a wind-proof jacket for the coldest parts. My main worries were blisters and boredom (since I did this on my own). All my anti-blisters preventions paid off, and surprisingly I had almost no blisters at all (only a couple of small ones in the little toes). Prevention for boredom was provided by my son, who lent me his MP3 player, which I filled with BBC podcasts to keep me entertained.
A friend is teasing me with going now for the 0-4-0 route (i.e. the same I did here, but then going all the way back to the starting point again). Let's see.... stay tuned!
Subscribe to:
Posts (Atom)